Stain-Free Carpets: Expert Tips to Tackle Every Type of Stain!

Carpets add warmth and elegance to your home, but they can also become a magnet for spills and stains. From red wine mishaps to muddy footprints, stains can be frustrating to deal with. The good news is that most carpet stains can be removed with the right approach and cleaning techniques. Whether it’s a fresh spill or a stubborn stain, this guide will provide you with expert tips to keep your carpets looking flawless.

Why Acting Fast Matters

When it comes to carpet stains, timing is everything. The longer a stain sits, the harder it becomes to remove. Fresh stains are much easier to tackle because they haven’t had a chance to penetrate deep into the carpet fibers. Acting quickly can prevent the need for deep carpet cleaning or even professional intervention.

General Tips for Removing Carpet Stains

Before diving into specific stains, it’s essential to know the basic rules for tackling any carpet stain:

  1. Blot, Don’t Rub
    Always blot the stain with a clean cloth or paper towel. Rubbing can push the stain deeper into the fibers, making it harder to remove.
  2. Work from the Outside In
    Start cleaning from the outer edges of the stain and work toward the center. This prevents the stain from spreading.
  3. Test Cleaning Solutions
    Before using any cleaner, test it on an inconspicuous area of the carpet to ensure it doesn’t cause discoloration.
  4. Avoid Excess Water
    Over-saturating the carpet can lead to mold and mildew. Use a small amount of water or cleaning solution to treat the stain.

How to Remove Common Carpet Stains

Here’s how to tackle some of the most common carpet stains effectively:

1. Red Wine Stains

  • Act Fast: Blot the spill immediately with a clean cloth to absorb as much liquid as possible.
  • Apply a Solution: Mix one part dish soap, one part white vinegar, and two parts warm water. Dab the solution onto the stain with a clean cloth.
  • Rinse and Blot: Use a damp cloth to rinse the area and blot dry.

2. Coffee Stains

  • Blot the Spill: Absorb the excess coffee with a paper towel.
  • Mix a Cleaning Solution: Combine one tablespoon of dish soap, one tablespoon of white vinegar, and two cups of warm water.
  • Apply and Blot: Dab the solution onto the stain and blot with a dry cloth until the stain is gone.

3. Pet Stains

  • Remove Solids First: Scoop up any solid debris and blot the liquid with a towel.
  • Use Enzymatic Cleaners: These cleaners break down proteins in pet stains and neutralize odors.
  • Blot and Rinse: After applying the cleaner, blot the area with a damp cloth and let it air dry.

4. Mud Stains

  • Let It Dry: Allow the mud to dry completely before attempting to clean it.
  • Vacuum the Area: Remove as much dried mud as possible with a vacuum.
  • Use a Detergent Solution: Mix a few drops of dish soap with warm water and dab it onto the stain with a cloth.

5. Grease and Oil Stains

  • Sprinkle Baking Soda: Cover the stain with baking soda and let it sit for 10-15 minutes to absorb the grease.
  • Vacuum: Vacuum up the baking soda.
  • Apply Dish Soap: Dab the area with a small amount of dish soap and rinse with a damp cloth.

6. Ink Stains

  • Use Rubbing Alcohol: Dab rubbing alcohol onto the stain with a cotton ball or cloth. Avoid rubbing.
  • Blot Dry: Once the stain lifts, blot the area with a clean, damp cloth to remove any residue.

When to Call Professionals

While many stains can be handled at home, some stubborn or old stains may require professional help. Hiring Top-rated Carpet Cleaners in Perth ensures your carpets receive expert care and a deep clean that restores their original beauty.

Preventing Future Stains

Prevention is always better than cure. Here are some tips to protect your carpets from future stains:

  • Use Area Rugs: Place rugs in high-traffic areas to minimize wear and tear on your carpets.
  • Vacuum Regularly: Regular vacuuming prevents dirt and debris from settling into the fibers.
  • Apply Carpet Protectors: Consider using a stain-resistant carpet treatment to create a barrier against spills.
  • Address Spills Immediately: Quick action can prevent stains from becoming permanent.

Conclusion

Removing stains from carpets doesn’t have to be a daunting task. By acting quickly, using the right cleaning techniques, and following these expert tips, you can tackle almost any stain and keep your carpets looking spotless. For stubborn stains or regular maintenance, consider carpet cleaning services from professionals to ensure your carpets remain in top condition. With proper care, your carpets can stay fresh, clean, and stain-free for years to come.

Maintaining clean and fresh furniture is essential for a comfortable and welcoming home. When it comes to cleaning upholstery, many people wonder whether they can use carpet cleaners on their furniture. While carpet and upholstery may seem similar, their cleaning requirements are quite different. Using the wrong product or method could lead to damage or unsatisfactory results. In this guide, we’ll explore whether carpet cleaners can be used for upholstery cleaning and the best practices for keeping your furniture spotless.

Understanding the Difference Between Carpet and Upholstery

Carpets and upholstery are made from different materials and are subjected to varying types of wear and tear. Understanding these differences is crucial before using any cleaning product.

  • Carpet Fibres: Carpets are typically made of durable materials designed to withstand heavy foot traffic. They are often thicker and can handle more aggressive cleaning methods.
  • Upholstery Fabrics: Upholstery, on the other hand, includes more delicate materials such as cotton, linen, leather, and microfiber. These fabrics are more sensitive to moisture and harsh chemicals, requiring gentler cleaning techniques.

Can You Use Carpet Cleaner on Upholstery?

While some carpet cleaners are labelled as safe for upholstery, not all products or machines are suitable for cleaning furniture. Here’s what you need to consider:

1. Product Compatibility

  • Carpet cleaners often contain chemicals formulated for tougher fibres and stains. These chemicals might be too harsh for delicate upholstery fabrics.
  • Always check the product label to see if it’s safe for upholstery. If in doubt, test the cleaner on a small, inconspicuous area of your furniture before applying it to the entire piece.

2. Machine Suitability

  • Carpet cleaning machines are generally designed for flat, durable surfaces. Using them on upholstery can lead to over-saturation or damage.
  • Many professional services offer specialised equipment, such as Microfiber Sofa Cleaning Services in Perth, to handle delicate fabrics safely.

3. Risk of Over-Saturation

  • Carpet cleaners often use more water, which can over-saturate upholstery and lead to mould, mildew, or water stains. Upholstery requires precise moisture control to avoid damage.

How to Clean Upholstery Safely

If you want to clean your upholstery effectively without causing damage, follow these steps:

Step 1: Check the Care Label

Before cleaning, look for the manufacturer’s care label on your furniture. This label provides instructions on suitable cleaning methods:

  • W: Water-based cleaners are safe to use.
  • S: Use solvent-based cleaners only.
  • WS: Water or solvent-based cleaners are acceptable.
  • X: Only vacuum cleaning is recommended; professional cleaning is necessary.

Step 2: Vacuum the Upholstery

Remove loose dirt, dust, and debris by vacuuming your furniture thoroughly. Use the upholstery attachment to clean crevices and seams effectively.

Step 3: Use an Upholstery-Safe Cleaner

Choose a cleaner specifically designed for upholstery fabrics. Always follow the instructions on the product label and test it on a hidden area first.

Step 4: Spot Clean Stains

  • Blot stains gently with a clean cloth—avoid rubbing, as it can spread the stain.
  • Use a mild cleaning solution, such as a mix of water and dish soap, to treat stains.
  • Rinse with a damp cloth and blot dry.

Step 5: Let It Dry Completely

Proper drying is crucial to prevent mould or mildew. Use fans or open windows to improve airflow and reduce drying time.

When to Call a Professional Upholstery Cleaner

While DIY cleaning methods can handle minor stains and general maintenance, professional upholstery cleaning is essential for deep cleaning and addressing stubborn issues. Here are some situations when hiring a professional is a smart choice:

  • Delicate Fabrics: Materials like silk, velvet, or microfiber require specialised care.
  • Persistent Stains or Odours: Professionals have access to advanced cleaning solutions and equipment to tackle tough stains and smells.
  • Deep Cleaning Needs: Over time, dirt, allergens, and bacteria build up within upholstery fibres. Professional cleaning ensures a thorough clean.

Benefits of Professional Upholstery Cleaning

  1. Safe Cleaning Methods: Professionals understand the unique requirements of different fabrics and use appropriate techniques to protect your furniture.
  2. Advanced Equipment: Specialised tools, such as steam cleaners and fabric-safe vacuums, deliver a deep and effective clean.
  3. Time and Effort Savings: Leave the hard work to the experts and enjoy a refreshed, clean couch without the hassle.
  4. Prolonged Furniture Life: Regular professional cleaning extends the life of your upholstery, preserving its beauty and comfort.

How to Choose the Right Cleaning Service

When selecting a professional cleaning service, consider the following:

  • Experience: Look for a company with a proven track record in cleaning various upholstery types.
  • Eco-Friendly Products: Ensure the service uses non-toxic, environmentally safe cleaning solutions.
  • Customer Reviews: Read testimonials to learn about the quality of their service.

For expert care, search for local services like Microfiber Sofa Cleaning Services in Perth to ensure your furniture receives the attention it deserves.

Conclusion

While carpet cleaners may seem like a convenient solution for cleaning upholstery, they’re not always the safest or most effective choice. Upholstery requires specialised care to ensure it remains in good condition. For deep cleaning and stubborn stains, professional upholstery cleaning services provide the expertise and tools needed to restore your furniture’s beauty. By following the tips in this guide, you can keep your upholstery looking fresh and inviting for years to come.

FAQs About Cleaning Upholstery

1. Can carpet shampoo ruin upholstery?

Yes, carpet shampoo can damage delicate upholstery fabrics if it’s not designed for furniture. Always check the product label before use.

2. How often should I clean my upholstery?

Professional cleaning is recommended every 12–18 months, depending on usage and exposure to dirt or allergens.

3. Is steam cleaning safe for all types of upholstery?

Steam cleaning is effective for many fabrics but may not be suitable for delicate materials. Consult a professional cleaner for advice.

4. How can I prevent stains on my upholstery?

Use fabric protectors, clean spills immediately, and vacuum regularly to minimise dirt and stains.

Fabric blinds are an elegant and functional choice for any home or office. They offer privacy, light control, and a touch of sophistication. However, fabric blinds require regular care to maintain their appearance and longevity. From daily upkeep to deep cleaning, knowing how to clean fabric blinds properly can make all the difference.

Why Regular Cleaning for Fabric Blinds Matters

  1. Prevents Dust Buildup: Fabric blinds can trap dust and allergens, affecting indoor air quality.
  2. Enhances Appearance: Regular cleaning keeps blinds looking fresh and free of stains or discoloration.
  3. Prolongs Lifespan: Proper care reduces wear and tear, saving you from frequent replacements.
  4. Improves Functionality: Clean blinds operate smoothly, allowing you to adjust light and privacy effortlessly.

Daily Care for Fabric Blinds

1. Dusting

Dusting is the easiest way to maintain your fabric blinds on a daily basis. It prevents dust and debris from settling deep into the fabric.

  • How to Do It:
    1. Fully extend the blinds to expose the entire surface.
    2. Use a microfiber cloth, feather duster, or vacuum cleaner with a soft brush attachment to remove dust.
    3. Work from the top to the bottom for a thorough clean.
  • Pro Tip: Dust your blinds at least once a week to prevent buildup and make deep cleaning less frequent.

2. Spot Cleaning Stains

Accidents happen, and stains are inevitable. Spot cleaning helps address them immediately, preventing them from setting into the fabric.

  • How to Do It:
    1. Mix a small amount of mild detergent with warm water.
    2. Dip a clean cloth into the solution and wring out the excess water.
    3. Gently blot (don’t rub) the stained area until the stain lifts.
    4. Rinse with a damp cloth and allow the blinds to air dry.
  • Pro Tip: Test the cleaning solution on a hidden area first to ensure it doesn’t discolor the fabric.

3. Rotate or Flip Blinds

Rotate or flip your fabric blinds periodically to prevent uneven fading caused by prolonged exposure to sunlight.

Deep Cleaning Fabric Blinds

For fabric blinds that haven’t been cleaned in a while or are heavily soiled, deep cleaning is necessary to restore their beauty.

1. Vacuum Cleaning

Vacuuming is an effective method for deep cleaning without taking the blinds down.

  • How to Do It:
    1. Attach a brush nozzle to your vacuum cleaner.
    2. Gently vacuum both sides of the blinds, starting from the top and working downward.
    3. Pay extra attention to edges and corners where dust tends to accumulate.

2. Steam Cleaning

Steam cleaning is a safe and efficient way to refresh your fabric blinds, especially for delicate materials.

  • How to Do It:
    1. Use a handheld fabric steamer or a steam cleaner with a fabric-safe attachment.
    2. Hold the steamer a few inches away from the blinds and move it in vertical strokes.
    3. Allow the blinds to air dry completely before rolling them up.
  • Pro Tip: Avoid excessive moisture, as it can damage the fabric or cause mold growth.

3. Hand Washing

For removable fabric blinds, hand washing can help remove deep stains and grime.

  • How to Do It:
    1. Remove the blinds from their mounting brackets.
    2. Soak them in a bathtub or large basin filled with warm water and mild detergent.
    3. Use a soft sponge or cloth to gently scrub the fabric.
    4. Rinse thoroughly with clean water and hang the blinds to air dry.
  • Pro Tip: Avoid wringing or twisting the fabric, as it can distort its shape.

4. Professional Cleaning

For delicate or high-value fabric blinds, professional services like Curtain Cleaning in Perth ensure a thorough and safe cleaning process.

  • Benefits of Professional Cleaning:
    • Removes deep stains and odors effectively.
    • Uses advanced tools and eco-friendly cleaning solutions.
    • Extends the lifespan of your blinds.

Preventative Tips for Fabric Blinds

  1. Control Humidity: Use a dehumidifier in damp areas to prevent mold and mildew.
  2. Keep Windows Clean: Dust and dirt from windows can transfer to blinds, so clean window frames regularly.
  3. Close Blinds During Sunlight: Protect your blinds from UV damage by closing them during peak sunlight hours.
  4. Use a Protective Spray: Apply a fabric-safe protector to repel stains and dirt.

How Often Should You Clean Fabric Blinds?

  • Daily: Dust blinds to prevent buildup.
  • Monthly: Spot clean visible stains or smudges.
  • Quarterly: Deep clean blinds to remove embedded dirt and allergens.
  • Annually: Hire professional cleaning services for a thorough refresh.

Benefits of Clean Fabric Blinds

  1. Improved Air Quality: Removes allergens, dust, and pollutants, making your indoor environment healthier.
  2. Enhanced Appearance: Clean blinds look brighter and more vibrant, enhancing your decor.
  3. Longevity: Regular care reduces wear and tear, saving you money on replacements.
  4. Functionality: Properly cleaned blinds operate smoothly, providing better light and privacy control.

Conclusion

Fabric blinds are a stylish and practical choice for any space, but they require regular care to maintain their beauty and functionality. From daily dusting to deep cleaning, these tips will help you keep your blinds looking fresh and new. For delicate or heavily soiled blinds, professional Curtain Cleaning services ensure they receive expert care without damage.

By incorporating these cleaning routines into your schedule, you can enjoy the lasting elegance and performance of your fabric blinds. Don’t wait—start your blind care routine today and keep your window treatments in top-notch condition!

Flooding can be a homeowner’s worst nightmare, leaving behind standing water, structural damage, and a risk of mold growth. Acting quickly and safely to remove water from your home is essential to minimize damage and ensure your property is livable again. For effective recovery, professional Water Damage Restoration services can help you get back on track.

Why Removing Water Quickly Is Critical

Standing water in your home can lead to several issues, including:

  • Structural damage to walls, floors, and foundations.
  • Electrical hazards from submerged outlets and appliances.
  • Mold and mildew growth, which can affect your health.

Taking prompt action to remove water safely is the first step in the flood recovery process.

Safe and Effective Ways to Remove Water from Your Home

1. Prioritize Safety First

Before entering your home, ensure it is safe.

  • Turn off electricity to avoid shocks.
  • Wear protective gear like gloves, boots, and masks.
  • Check for structural issues such as weakened walls or ceilings.

2. Identify the Source of Water

Determine the source of flooding. If it’s due to a burst pipe or plumbing issue, shut off the main water supply immediately.

3. Remove Standing Water

Use these methods to remove standing water effectively:

  • Buckets and Mops: For small amounts of water, manually remove it using buckets, mops, and towels.
  • Wet/Dry Vacuum: Use a shop vacuum to suction up water from floors and carpets. These vacuums are efficient for moderate flooding.
  • Pumps: For large volumes of water, rent or purchase a submersible pump to drain water quickly.

4. Dry and Dehumidify the Area

After removing the water, thoroughly dry the area to prevent mold growth:

  • Use industrial fans to promote airflow.
  • Open windows and doors for ventilation if weather permits.
  • Run a dehumidifier to reduce moisture levels in the air.

5. Remove Water-Damaged Items

Take out any waterlogged items such as carpets, furniture, and insulation. Items that cannot be thoroughly dried or cleaned should be discarded to prevent mold.

6. Clean and Disinfect Surfaces

Wash all hard surfaces with soap and water. Follow up with a disinfectant solution to kill bacteria and prevent contamination.

7. Inspect for Hidden Moisture

Water can seep into cracks, walls, and subfloors, leading to hidden damage. Use a moisture meter to detect areas that need additional drying.

8. Call Professionals for Severe Damage

If the flooding is extensive or caused by contaminated water, contact a professional Restoration service. Professionals have the tools and expertise to thoroughly dry, clean, and restore your home safely.

How Professional Water Damage Restoration Helps

Professional restoration services provide comprehensive solutions to address all aspects of flood recovery, including:

  • Water Extraction: Quickly removing standing water with industrial-grade pumps and vacuums.
  • Structural Drying: Using advanced drying equipment to eliminate moisture from walls, floors, and ceilings.
  • Mold Prevention: Applying anti-mold treatments to prevent growth in damp areas.
  • Restoration: Repairing or replacing damaged structures and materials to restore your home to its pre-flood condition.

Contact Us

If your home has been affected by flooding, we’re here to help. Our experienced team specializes in Water Damage Restoration near me to ensure your property is safely dried, cleaned, and restored. Contact us today for a consultation and take the first step toward reclaiming your home.

FAQs About Removing Water After a Flood

Q1: How quickly should I remove water from my home after a flood?

You should begin water removal within 24-48 hours to prevent severe damage and mold growth.

Q2: Can I handle water removal on my own?

For minor flooding, DIY methods may suffice. However, for extensive flooding or contaminated water, professional Damage Restoration is recommended.

Q3: What items can be salvaged after a flood?

Hard surfaces like metal, glass, and some plastics can often be cleaned and saved. Soft materials like carpets, mattresses, and upholstered furniture may need to be discarded.

Q4: How do I prevent mold after removing water?

Thoroughly dry the area, maintain proper ventilation, and use anti-mold treatments to prevent growth.

A mattress topper adds an extra layer of comfort and support to your bed, enhancing your sleep experience. However, just like your mattress, toppers accumulate dirt, sweat, spills, and allergens over time. Regular cleaning of your mattress topper is essential to maintain its freshness, extend its lifespan, and ensure a hygienic sleeping environment.

This ultimate guide will walk you through the right way to clean your mattress topper, using simple yet effective techniques to keep it in top-notch condition.

Why Clean Your Mattress Topper Regularly?

Mattress toppers are exposed to daily wear and tear, making them susceptible to dirt, odors, and bacteria. Regular Mattress Cleaning helps to:

  • Remove dust, allergens, and sweat buildup.
  • Prevent stains and odors from settling in.
  • Extend the life of your mattress topper.
  • Ensure a healthier and more comfortable sleep environment.

Step-by-Step Guide to Cleaning Your Mattress Topper

Here’s how to clean your mattress topper effectively, step by step:

1. Check the Care Label

Before you begin, read the care label on your mattress topper for specific cleaning instructions. Different materials, such as memory foam, latex, or down, have unique cleaning requirements. Following the manufacturer’s guidelines ensures you don’t damage the topper.

2. Remove and Wash the Bedding

Strip your mattress topper of all bedding, including sheets and mattress protectors. Wash these items in hot water with a gentle detergent to eliminate dirt, sweat, and bacteria.

3. Vacuum the Mattress Topper

Using a vacuum cleaner with an upholstery attachment, vacuum the entire surface of your mattress topper. This removes loose dirt, dust, and debris. Pay special attention to creases, corners, and edges where dirt tends to accumulate.

Regular vacuuming helps reduce allergens and keeps your topper fresh between deep cleanings.

4. Spot Clean Stains

Spills and stains are inevitable, but they don’t have to ruin your mattress topper. Here’s how to tackle stains safely:

  1. Blot the Stain: Use a clean cloth or paper towel to absorb as much of the spill as possible. Avoid rubbing, as this can spread the stain.
  2. Create a Cleaning Solution: Mix a small amount of mild detergent with warm water. For natural cleaning, use a mixture of white vinegar and water.
  3. Dab the Stain: Dip a cloth or sponge into the solution and gently dab the stained area. Be cautious not to soak the material, especially for memory foam toppers.
  4. Rinse and Dry: Wipe away the soap residue with a damp cloth, then blot the area dry with a towel. Let it air dry completely before use.

For stubborn stains or deep cleaning, consider contacting Best Mattress Cleaning Services for professional assistance.

5. Deodorize with Baking Soda

To eliminate odors and refresh your mattress topper:

  1. Sprinkle baking soda evenly over the entire surface of the topper.
  2. Let it sit for a few hours, or overnight for stronger odors.
  3. Vacuum thoroughly to remove the baking soda residue.

This step is particularly effective for memory foam and latex toppers, as baking soda absorbs moisture and neutralizes odors.

6. Wash the Mattress Topper (If Applicable)

Some toppers, especially those made of down or cotton, may be machine washable. If the care label permits:

  1. Use a gentle cycle with cold water and a mild detergent.
  2. Avoid using bleach or fabric softeners, as they can damage the material.
  3. Dry the topper on low heat or air-dry it to prevent shrinkage or clumping.

7. Air Out the Mattress Topper

Fresh air helps eliminate moisture, odors, and bacteria. Place your mattress topper in a well-ventilated area or near an open window. If possible, let it air out in indirect sunlight, as UV rays naturally kill bacteria and freshen fabrics.

Maintenance Tips for Mattress Toppers

  1. Use a Mattress Protector: A waterproof protector shields your topper from spills, stains, and allergens, reducing the frequency of deep cleaning.
  2. Vacuum Regularly: Vacuuming once a month keeps dirt and dust at bay.
  3. Flip and Rotate: Rotate and flip your topper (if possible) every few months to ensure even wear.
  4. Wash Bedding Weekly: Clean sheets and covers regularly to prevent dirt and sweat from transferring to your topper.

When to Replace Your Mattress Topper

Even with proper care, mattress toppers don’t last forever. Signs it’s time to replace your topper include:

  • Persistent odors that won’t go away after cleaning.
  • Visible wear and tear, such as thinning or sagging.
  • Loss of support or comfort.

When to Call Professionals

If your mattress topper has deep stains, stubborn odors, or hasn’t been cleaned in a long time, professional cleaning can make a world of difference. Look for trusted Mattress Cleaning experts for thorough cleaning and maintenance.

Benefits of Keeping Your Mattress Topper Clean

  1. Healthier Sleep Environment: A clean topper reduces allergens, dust mites, and bacteria, improving your overall health.
  2. Enhanced Comfort: Regular maintenance ensures your topper stays soft, supportive, and odor-free.
  3. Prolonged Lifespan: Proper care protects your investment and extends the life of your mattress topper.

Conclusion

Cleaning your mattress topper is simpler than you might think, and it’s a crucial step in maintaining a fresh and healthy sleep environment. From vacuuming and spot cleaning to deodorizing with baking soda, these steps will keep your topper in excellent condition. For tougher cleaning needs, don’t hesitate to reach out to Best Mattress Cleaning Services for professional care. With regular maintenance and a little effort, your mattress topper will continue to provide you with comfort and relaxation for years to come.

Persian rugs are a timeless symbol of elegance and craftsmanship, treasured for their intricate designs and rich history. These handmade masterpieces deserve special care to maintain their beauty and longevity. While Persian rugs are durable, improper cleaning methods can damage their delicate fibers and vibrant patterns.

In this guide, we’ll explore the dos and don’ts of Persian rug care, offering expert tips to help you preserve its charm. Whether you’re tackling stains, regular upkeep, or a deep clean, these tips will ensure your Persian rug stays as exquisite as the day you bought it.

Why Persian Rugs Need Special Care

Persian rugs are made from natural fibers like wool, silk, or cotton, which are hand-knotted to create intricate patterns. This craftsmanship makes them more delicate than machine-made rugs. Dirt, spills, and improper handling can weaken the fibers, cause fading, or distort the design. Regular maintenance is key to protecting your rug’s value and aesthetics.

The Dos of Persian Rug Cleaning

To keep your Persian rug looking pristine, follow these expert-recommended practices:

1. Vacuum Regularly (Gently)

  • Vacuum your Persian rug weekly to remove dirt and dust that can settle deep into the fibers.
  • Use a vacuum with no rotating brush (or disable it) to avoid pulling or damaging the delicate threads.
  • Vacuum both sides of the rug every few months to ensure thorough cleaning.

Regular vacuuming prevents dirt buildup, which can degrade the rug’s texture over time.

2. Spot Clean Spills Immediately

Accidents happen, but quick action can save your rug from permanent stains.

  • Blot spills with a clean, dry cloth—never rub, as this can spread the stain or damage the fibers.
  • For water-based spills, use a damp cloth and blot gently.
  • For tougher stains like wine or coffee, mix a small amount of mild detergent with lukewarm water and apply it sparingly.

Always test cleaning solutions on an inconspicuous area first to avoid discoloration.

3. Rotate Your Rug Regularly

Persian rugs placed in high-traffic areas are prone to uneven wear.

  • Rotate your rug every few months to ensure even exposure to foot traffic and sunlight.
  • This simple step prevents fading and keeps your rug looking uniform.

4. Air It Out

Moisture trapped in Persian rugs can lead to mold and mildew.

  • Air out your rug in a shaded, well-ventilated area every few months.
  • Avoid direct sunlight, as it can cause the colors to fade.

Proper ventilation ensures your rug stays fresh and free from musty odors.

The Don’ts of Persian Rug Cleaning

Equally important are the things you should avoid when cleaning and maintaining your Persian rug:

1. Don’t Use Harsh Chemicals

Bleach, ammonia, and other strong chemicals can ruin the fibers and strip the colors of your Persian rug.

  • Stick to gentle, wool-safe detergents or natural cleaning solutions.
  • Avoid generic carpet cleaners unless they’re specifically designed for delicate rugs.

2. Don’t Scrub Aggressively

Scrubbing can fray the fibers and distort the rug’s intricate patterns.

  • Always blot stains gently instead of scrubbing.
  • Use soft brushes for any deeper cleaning, and handle with care.

3. Don’t Over-Saturate the Rug

Excessive water can damage the rug’s foundation and backing.

  • Use water sparingly when spot cleaning or rinsing.
  • Ensure the rug dries completely after cleaning to avoid mold and mildew growth.

4. Don’t Ignore Professional Help

While regular maintenance can be done at home, deep cleaning Persian rugs requires expert care.

  • If your rug has stubborn stains, excessive dirt, or a delicate silk composition, consider hiring professionals.
  • Search for cheap rug cleaning services in your area to ensure your rug gets the care it deserves without breaking the bank.

When to Call the Professionals

Even with diligent care, there are times when professional cleaning is necessary.

  • Deep Cleaning: Over time, dirt and dust accumulate beyond the surface and require specialized equipment to remove.
  • Stains and Odors: Persistent stains or pet odors can be effectively removed by professional cleaners.
  • Antique Rugs: Older Persian rugs require expert handling to avoid damage.

Look for experienced professionals who specialize in Persian rugs to ensure your rug gets gentle, thorough cleaning.

Benefits of Regular Persian Rug Care

Caring for your Persian rug doesn’t just preserve its beauty; it also provides several practical benefits:

  1. Prolongs Rug Life: Regular maintenance prevents wear and tear, extending the lifespan of your rug.
  2. Enhances Value: Well-maintained rugs retain their value and remain an investment piece.
  3. Improves Air Quality: Clean rugs reduce allergens and dust in your home, creating a healthier environment.

Conclusion

Persian rugs are more than just floor coverings—they’re works of art that deserve thoughtful care. By following the dos and don’ts outlined in this guide, you can keep your rug looking vibrant and pristine for years. Regular vacuuming, spot cleaning, and rotation, combined with professional cleaning when needed, will help you preserve its elegance and value.

When your rug requires extra attention, don’t hesitate to explore cheap rug cleaning services to ensure expert care at an affordable price. With consistent maintenance and a little love, your Persian rug will continue to enhance your home with its timeless beauty.

Steam cleaning is a popular method for maintaining the beauty and hygiene of tiled surfaces. Its ability to deeply clean without harsh chemicals makes it a go-to choice for homeowners. However, like any cleaning method, steam cleaning has its advantages and limitations, especially when it comes to tiles and grout.

What Is Steam Cleaning?

Steam cleaning uses high-temperature steam to loosen dirt, grime, and stains from surfaces. The process eliminates the need for chemical cleaners, relying on heat and moisture to sanitize and clean tiles effectively. This method works on various tile types, including ceramic, porcelain, and natural stone, but the results may vary based on the tile material.

Pros of Steam Cleaning for Tiles

1. Chemical-Free Cleaning

  • Steam cleaning relies solely on water, eliminating the need for chemical-based products.
  • This makes it an eco-friendly and safe option for households with children and pets.

2. Deep Cleaning

  • High-temperature steam penetrates deeply into tile pores and grout lines, removing embedded dirt and bacteria.
  • It’s particularly effective for sanitizing kitchens, bathrooms, and other high-traffic areas.

3. Kills Germs and Bacteria

  • Steam cleaning kills up to 99.9% of germs, bacteria, and mold spores, promoting a healthier indoor environment.

4. Restores Tile Appearance

  • The process removes stains, grease, and residue, restoring the original shine of your tiles.
  • Grout lines, often the dirtiest parts of tiled surfaces, also benefit from a fresh look after steam cleaning.

5. Versatile Application

  • Steam cleaning works well on various tile materials, from ceramic and porcelain to some types of natural stone (with caution).

Cons of Steam Cleaning for Tiles

1. Not Suitable for All Tiles

  • Natural stone tiles like marble, slate, or travertine may be damaged by excessive heat or moisture.
  • Steam can weaken the sealant on natural stone, making it more prone to stains.

2. Can Damage Grout

  • Prolonged exposure to steam can weaken grout, especially if it’s already cracked or poorly sealed.
  • Regular maintenance, such as Tile and Grout Sealing, can help protect grout lines from steam damage.

3. Risk of Water Damage

  • If not done properly, excess moisture from steam cleaning can seep into tile joints and subfloors, leading to water damage or mold growth.

4. Requires Specialized Equipment

  • Steam cleaners can be expensive to purchase or rent.
  • Improper use of steam cleaning tools can lead to uneven results or even damage.

5. Time-Consuming

  • For larger spaces or heavily soiled tiles, steam cleaning may take longer than traditional methods like mopping.

Tips for Steam Cleaning Tiles Safely and Effectively

To get the best results from steam cleaning, follow these tips:

  1. Vacuum or Sweep First
    • Remove loose dirt and debris before steam cleaning to prevent scratching the tiles.
  2. Test a Small Area
    • Always test the steam cleaner on a small, inconspicuous area to ensure it doesn’t damage the tiles or grout.
  3. Use the Right Temperature
    • Adjust the steam cleaner’s settings based on the type of tiles you’re cleaning.
    • Avoid using high heat on natural stone or delicate tiles.
  4. Keep Moving
    • Don’t hold the steam cleaner in one spot for too long, as this can damage the tiles or grout.
  5. Dry the Surface
    • After steam cleaning, use a dry microfiber cloth or mop to remove excess moisture and prevent water spots.

When to Consider Professional Tile Cleaning

While steam cleaning is effective for routine maintenance, there are times when professional help is necessary:

  • Stubborn Stains: Deep-seated stains that don’t respond to DIY methods.
  • Extensive Grout Damage: If grout lines are discolored or crumbling, professionals can repair and seal them.
  • Specialized Stone Tiles: Natural stone tiles require expert care to avoid damage during cleaning.

Professional services not only clean your tiles thoroughly but also provide additional treatments like Tile and Grout Sealing, ensuring long-term protection and easier maintenance.

Benefits of Regular Tile Cleaning

Routine tile cleaning offers numerous advantages, including:

  • Preserves Appearance: Keeps tiles looking new by removing dirt and stains.
  • Improves Hygiene: Eliminates bacteria and allergens, contributing to a healthier home.
  • Extends Lifespan: Prevents wear and tear, ensuring your tiles last longer.
  • Reduces Maintenance: Sealed tiles and grout lines are easier to clean and maintain.

Conclusion

Steam cleaning is an excellent method for deep-cleaning tiles, offering chemical-free sanitization and a refreshed appearance. However, it’s essential to understand its limitations, especially for delicate materials like natural stone. By following proper techniques and considering professional services for tasks like Tile and Grout Sealing, you can ensure your tiled surfaces remain beautiful and durable for years to come. Whether you choose to steam clean on your own or hire experts, regular maintenance is the key to sparkling tiles.

Carpets add warmth and style to any space, but over time, they can suffer from damage like burns, stains, snags, and wrinkles. While minor issues can often be repaired with DIY techniques, some damage requires professional expertise to restore the carpet’s original look and durability.

Knowing when to fix the problem yourself and when to call in an expert can save you both time and money. This guide will help you determine the best approach for common carpet issues.

Common Carpet Damages and How to Fix Them

1. Carpet Burns

Burn marks from cigarettes, candles, or hot irons can leave noticeable scars on your carpet.

DIY Repair:

  • Use scissors to trim the burnt fibers carefully
  • If the burn is deep, cut out the damaged section and replace it with a matching piece from a carpet remnant
  • Use carpet adhesive or double-sided tape to secure the patch in place

When to Call a Pro:

  • The burn is large and cannot be patched seamlessly
  • The carpet fibers are significantly melted, making DIY blending difficult

2. Carpet Wrinkles and Ripples

Over time, carpets can develop loose areas or ripples due to improper installation, humidity, or furniture movement.

DIY Repair:

  • Use a knee kicker to push the carpet back into place
  • Secure the edges using tack strips

When to Call a Pro:

  • Wrinkles keep reappearing despite DIY attempts
  • A power stretcher is required for large areas to ensure even tension

3. Carpet Stains and Discoloration

Spilled coffee, pet accidents, or ink stains can make your carpet look dull and dirty.

DIY Repair:

  • Blot stains immediately with a clean cloth to absorb excess liquid
  • Use a mixture of vinegar and water for organic stains
  • Apply baking soda to remove lingering odors before vacuuming

When to Call a Pro:

  • The stain has set deeply into the carpet fibers
  • The carpet requires professional carpet cleaning for complete stain removal

4. Carpet Tears and Holes

Pets, furniture, or general wear can cause rips and holes in your carpet.

DIY Repair:

  • Cut a patch from a leftover carpet remnant
  • Secure the patch with carpet tape or glue
  • Trim fibers around the patch to blend it in

When to Call a Pro:

  • The damage is in a high-traffic area, requiring a seamless finish
  • The carpet tear is large and needs professional reweaving

5. Loose Carpet Seams

Over time, carpet seams may start to separate, creating gaps between sections.

DIY Repair:

  • Use seam adhesive to glue the edges back together
  • Place a heavy object over the seam until the glue sets

When to Call a Pro:

  • The seam continues to separate after multiple repairs
  • The carpet has significant wear around the seams, requiring professional reinforcement

For complex repairs, Carpet Maintenance and Repair Experts in Perth can help restore your carpet professionally and prevent further deterioration.

How to Prevent Carpet Damage

Taking preventive steps can help keep your carpet in great shape and reduce the need for frequent repairs.

  1. Vacuum regularly to remove dirt and debris that weaken carpet fibers
  2. Use furniture pads to prevent heavy furniture from leaving indentations
  3. Clean spills immediately to avoid permanent stains
  4. Refrain from dragging furniture across the carpet
  5. Schedule professional carpet cleaning to maintain fiber strength and appearance

Conclusion

While minor carpet damages can be fixed with DIY methods, significant issues like large burns, deep stains, and loose seams often require professional intervention. Understanding the difference between a quick fix and a long-term solution can help you maintain a beautiful and durable carpet. Regular maintenance and carpet cleaning also play a vital role in keeping your flooring in top condition for years.

Carpet stains are an inevitable part of life, whether caused by accidental spills, muddy shoes, or pet mishaps. While regular carpet cleaning helps maintain your carpet’s appearance and longevity, knowing how to tackle common stains can save you time and money. In this guide, we’ll explore the most frequent carpet stains and provide effective solutions to remove them, ensuring your carpet remains spotless and fresh.

1. Coffee and Tea Stains

Coffee and tea stains are notorious for their dark, stubborn marks on light-coloured carpets. The tannins in these beverages can quickly set if not addressed promptly.

How to Remove:

  • Blot the stain immediately with a clean, dry cloth to absorb as much liquid as possible.
  • Mix one teaspoon of dish soap with two cups of warm water.
  • Apply the solution to the stain with a clean cloth and blot gently.
  • Rinse the area with water and blot dry.

2. Red Wine Stains

Red wine spills can be particularly challenging due to the vibrant colour and acidity of the liquid.

How to Remove:

  • Blot the spill with a paper towel or clean cloth, avoiding any rubbing.
  • Sprinkle salt over the stain to absorb excess liquid.
  • After 10 minutes, vacuum the salt away.
  • Apply a mixture of dish soap, white vinegar, and warm water to the stain. Blot gently until the stain lifts.

3. Pet Stains and Odours

Accidents from pets can leave unsightly stains and unpleasant odours on your carpet. These stains require quick action to avoid permanent damage.

How to Remove:

  • Blot the area with a dry cloth to absorb moisture.
  • Use an enzymatic cleaner designed for pet stains to break down proteins and remove odours.
  • Blot with a clean cloth and rinse with water.
  • For persistent odours, professional cleaning of carpets may be necessary.

4. Mud Stains

Mud stains are common in homes with pets, children, or heavy foot traffic, especially during wet weather.

How to Remove:

  • Allow the mud to dry completely before cleaning.
  • Gently scrape off dried mud with a spoon or blunt knife.
  • Vacuum the area to remove loose particles.
  • Apply a mild detergent solution and blot the stain with a clean cloth. Rinse and blot dry.

5. Grease and Oil Stains

Grease and oil stains can leave unsightly, dark spots on your carpet and are often tricky to remove without the right approach.

How to Remove:

  • Sprinkle baking soda or cornstarch over the stain to absorb the grease. Let it sit for 15 minutes.
  • Vacuum the area to remove the powder.
  • Apply a small amount of rubbing alcohol or a degreasing detergent to the stain.
  • Blot gently until the stain lifts.

6. Ink Stains

Ink stains from pens or markers can be particularly daunting, but they’re not impossible to remove.

How to Remove:

  • Dab the stain with rubbing alcohol using a cotton ball or cloth. Avoid rubbing to prevent spreading.
  • Blot with a clean cloth until the ink lifts.
  • Rinse with water and blot dry.
  • For tough ink stains, consider professional carpet cleaning for a thorough solution.

7. Blood Stains

Blood stains should be addressed quickly, as they can set into the carpet fibres if left untreated.

How to Remove:

  • Blot the stain with a cloth soaked in cold water. Avoid using warm or hot water, as this can cause the blood to set.
  • Apply a mixture of dish soap and cold water to the stain. Blot gently until the stain lifts.
  • Rinse with water and blot dry.

8. Chocolate Stains

Chocolate stains are common in households with children and can leave greasy, dark marks if not removed properly.

How to Remove:

  • Scrape off excess chocolate with a spoon or knife.
  • Apply a mixture of dish soap and warm water to the stain.
  • Blot the area gently with a clean cloth.
  • Rinse with water and blot dry.

When to Call a Professional Carpet Cleaner

While DIY methods can handle many stains, some may require professional expertise. Deep-set stains, persistent odours, or extensive damage are best addressed by professional services. They use advanced equipment and specialised techniques to restore your carpet’s appearance without causing further damage.

Contact Us for Professional Services

At Prompt Carpet Cleaning, we specialise in removing tough stains and refreshing carpets with our professional Cheap carpet cleaning services. Our experienced technicians use eco-friendly products and state-of-the-art equipment to deliver outstanding results.

Contact us today to schedule your cleaning and enjoy spotless, fresh carpets in no time!

Conclusion

Carpet stains are a common challenge, but with the right approach, most can be effectively removed. Acting quickly, using the right cleaning solutions, and knowing when to call a professional carpet cleaning service can keep your carpets looking fresh and stain-free. By following these tips, you’ll ensure your carpet remains a clean and welcoming part of your home.

FAQs About Carpet Stains and Cleaning

1. How soon should I treat a carpet stain?

Treat stains immediately to prevent them from setting. Quick action makes removal easier and more effective.

2. Can I use household cleaners on my carpet?

While some household cleaners can be effective, ensure they are carpet-safe. Test on a small, hidden area first.

3. How often should I have my carpets professionally cleaned?

It’s recommended to clean carpets professionally every 12–18 months or more frequently for high-traffic homes.

Professional Cleaning For Floor and Wall Tiles, Call Us Now: We Serve Entire Carine

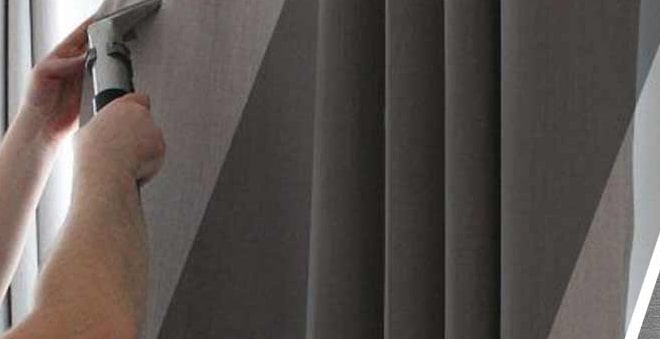
Knowing how to avoid the most common mistakes people make when cleaning is essential. A simple wipe-down of the walls and floor won’t do the trick. Instead, consider using a service to deep clean your tile grout. Our professional tile cleaners in Carine can attend to your tile and grout immediately.
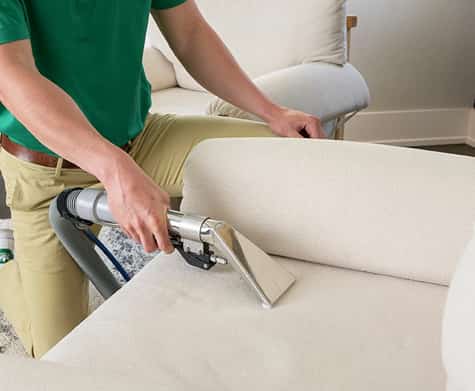
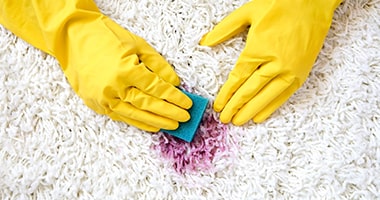
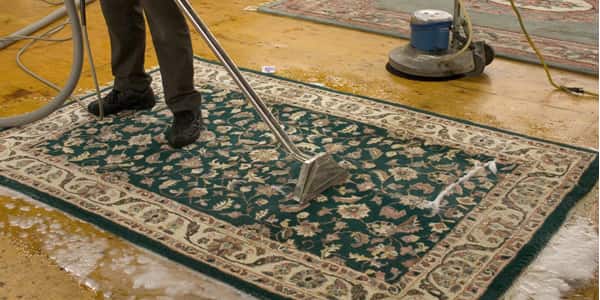
Here at Prompt Tile And Grout Cleaning Carine, we have all resources to restore the lost shine and lustre over time. From steam cleaning to dry cleaning and pressure cleaning to sealing, we can do everything to get the job done if you want a spotless finish. Our grout cleaning methods are effective because we know that grouts are porous and rapidly absorb dirt and debris so we clean them accordingly. Additionally, we can clean mould, fungi, bacteria, and pathogens from your tiles and grouts.
Any time, any day, anywhere in Carine, you can count on our Tile and grout cleaning Carine staff to provide you with the assistance you need. You can get in touch with our team right now.

Get Service Fast 08 6117 2921

Get a Free Quote

    Special Tile Cleaning Deals For Your Dining, Kitchen, Hall & Lounge Area At Best Prices

    We guarantee that you will be well taken care of whenever you hire us to do your tile and grout cleaning. Our professional tile cleaning services in Carine, have earned us a reputation for excellence amongst our clients and made us a spot at the top of the industry. When it comes to helping our clients, we consistently strive to go above and beyond.

    Bathrooms Floors

    Bathroom floors and walls tile cleaning

    The tile and grout in your bathroom or shower take regular hits from moisture, soap, detergents, and shampoo. This raises the potential for mould and stain growth and causes surfaces to become dangerous and slippery. In Carine, we can clean and repair your washroom tile and grout so that you can feel safe walking on them again.

    Shower Tile

    Shower tile cleaning

    Our expert cleaners can thoroughly scrub your tiled shower and bathroom floors. Prompt Tile Cleaning uses top-tier equipment and products to ensure a bacterium- and germ-free environment for your tiled shower. We remove any traces of grime, pollutants, and mould development to restore your bathroom tiles to their original beauty.

    Kitchen Floors

    Kitchen floors and walls tile cleaning

    Tiles that have seen better days can be restored to their former glory with the help of our powerful cleaning agents, which eliminate embedded dirt, grease, mould, and mildew—a must-have for everyone who has tile floors or walls in their kitchen.

    Providing a Service to Eliminate Mould and Mildew from Walls, Floors, and Fixtures

    Grout and tiles may quickly become a breeding ground for unsightly mould and mildew. Bathrooms are prime breeding grounds due to high humidity and the accumulation of soap scum.
    The Mold and Mildew Treatment offered by Prompt Tile Cleaning combines our tried-and-true restorative cleaning procedure with an anti-microbial stain removal solution to eliminate unsightly mould and mildew effectively.

    Mould and Mildew Removal Service From Tile

    Call Us And Protect Your Grouts With Professional Cleaning And Sealing

    Since grout is made of sand, cement, and water, it is easily damaged by liquids and debris once it has been laid and allowed to dry. The grout between tiles is highly porous and can be permanently discoloured by spilled liquids or waste. Grout is stained from foot traffic, and dirt is an eyesore and a health hazard.
    We are here with the best solution that can save your tiles and grouts from early damage and cleaning problems. We can clean and seal your tiles and grouts in the best way. This adds many years of life to your tiled floor and you can maintain them neat and clean with mopping and vacuum cleaning.

    Get Service Fast 08 6117 2921

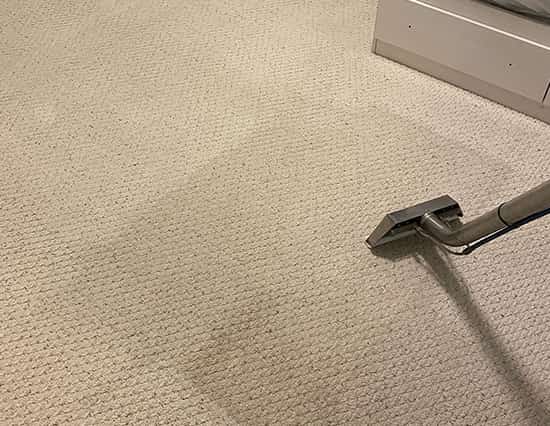
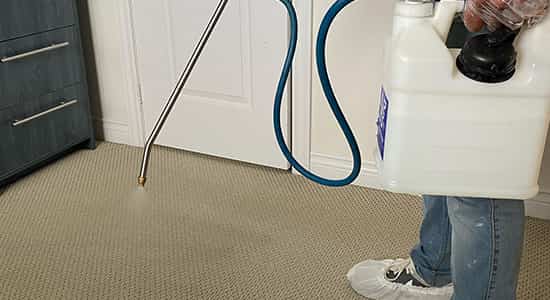
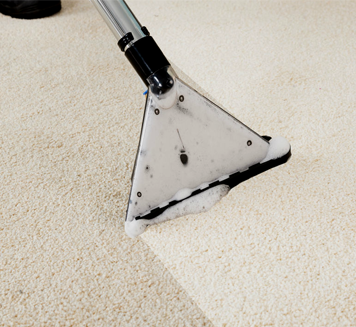
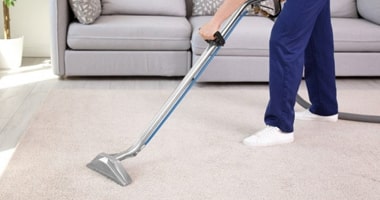
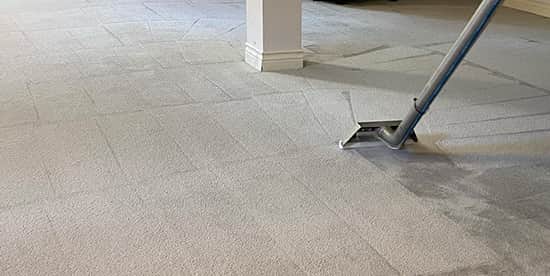
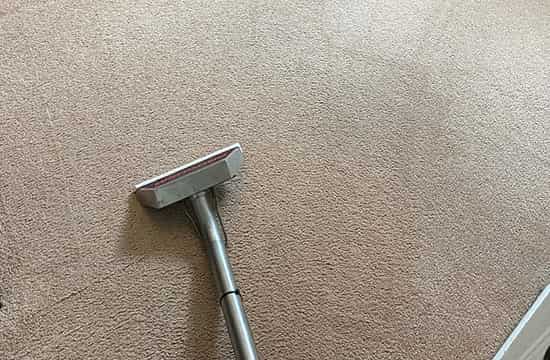
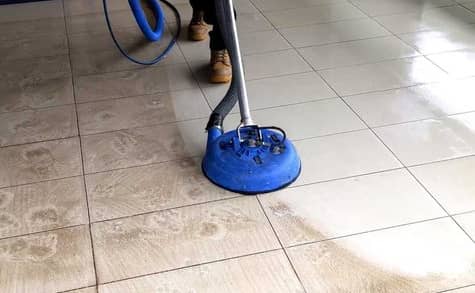
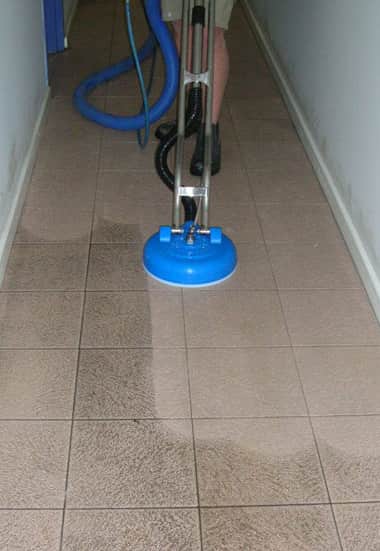
    Tile Steam Cleaning: Obtain Our Service In Carine

    In tile steam cleaning, we utilize a solution that is odourless, high-quality, and environmentally safe. Our method does not risk any harm to your tiles or grout, and it will not splash water onto your walls or other surfaces.
    Whether it’s ceramic, porcelain, or natural stone, our Tile and grout cleaning Carine system can revitalize it. Your tile and grout will be dried and sterilized before we depart, and our team won’t leave behind any residue or trace of the service except shining tiles.

    Common Tile and Grout Issues We Solve Daily

    Efflorescence

    Efflorescence

    Probably the most common problem is a buildup of salt on the tiles. Efflorescence is a condition of tiles that are challenging to remove. We can remove them easily.

    Gap In Grouts

    Gap In Grouts

    Spaces in grouts can arise for several causes. Excessive humidity is a significant contributor. The creation of gaps is another potential outcome of using poor-quality grout.

    Loose Sealing

    Loose Sealing

    It’s because of this that tiles tend to come loose. This is because of inadequate sealing. You can take help from our team to fix such problems. We use the best sealer available in the market.

    Stain

    Stain

    Many specks of dust are left behind on tiles. This causes dirt, grit, and grime to settle onto the floor tiles. This causes discolouration and stains. Stains like these become more challenging to remove the longer they sit.

    Why We Are Ideal For Your Tile and Grout Cleaning Carine Needs

    Prompt Tile Cleaning is proud of its services and the positive feedback we have received from our customers. Our superior customer service sets us apart from other tile cleaning service providers. When we’re done cleaning your tiles, your tile will be shining like new. When it comes to cleaning your floors, we make sure to instruct our staff on the most secure practices. Below given are some more reasons for hiring us in Carine:

    • Cleaning According To Condition The state of your tile and grout will determine our approach to cleaning it. When it comes to doing their jobs, our specialists are very versatile.
    • We Clean All Tiles Marble, granite, travertine, slate, terracotta, sandstone, ceramic, porcelain, and polished porcelain are just some of the floor and wall tiles we handle and work with regularly.
    • Special Treatment For Moulds With our mould and mildew treatment, your tile and grout will appear as good as new.
    • Restorative Cleaning AvailableTo ensure that your tile floor looks as good as new, we’ll have a team of experts restore it for you.
    • Certified Tile Cleaning Team Our tile cleaners are trained professionals who hold appropriate certifications and licenses.
    Tile And Grout Cleaning Carine

    We cover all Carine suburbs, Including CBD, North, South, East & West.

    We offer extensive Tile and grout cleaning Carine services. Our grout cleaning company serves all of Carine, including its outlying neighbourhoods. You can contact us by phone or through our website to arrange that. You may rely on us if you live in any part of Carine. We serve the entire Western Carine area and all of WA’s suburbs to the north, south, and central West. Our tile and grout cleaning services are available the day you call.

    FAQ’s

    The quickest service time we’ve seen was an hour and a half, but for larger homes, it can easily take three to four hours.

    After you book, we’ll be able to provide you with a more precise quote based on the number of square meters you’ll be using. We will contact you when you schedule our services to confirm the specific time and day. We’ll put a hold on your card the day before the cleaning, and then we’ll charge you for it on the day of the service.

    We advise waiting for at least three to four hours after sealing flooring and thirty minutes after cleaning tile and grout to avoid damaging the sealant.

    The number of tile cleaners we send depends on the size of your home or business, but it is always one unless the floors are highly grimy or several.

    Yes, We are a licensed, bonded, and insured business. The cleaning staff all have full coverage insurance as well.

    Location: Carine, WA, Australia